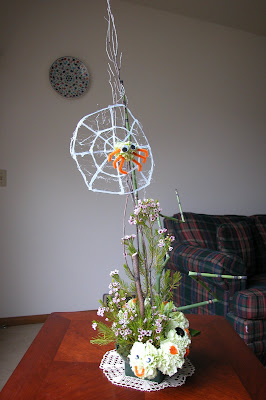
This is a fall design I made out of a mixed bouquet I got from Costco. I designed it in a real pumpkin that I emptied inside and inserted a floral foam. I used every bit of the flowers in the bouquet and I also added some dried fall leaves from our yard:)
Tuesday, March 31, 2009
Tuesday, March 10, 2009
RECTANGULAR VASES
Wednesday, March 4, 2009
WATERFALL DESIGN
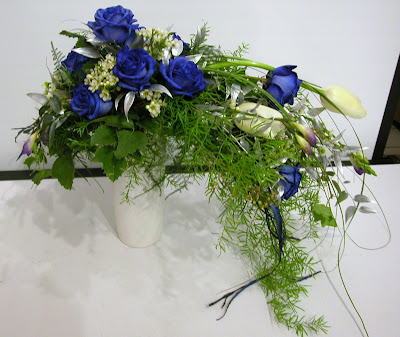
Waterfall or cascading designs representing waterfall were initially created for bridal bouquets in Europe at the beginning of 1900s. They are usually heavy on foliage with even non botanical materials flowing downwards. They have an untidy, undisciplined appearance, representative of splashing, glistening water. White, blue and gray colored materials complement the overall theme. Dyed blue roses are especially interesting in this design.
Tuesday, March 3, 2009
Monday, March 2, 2009
PUSSY CAT
Novelty designs are different, one-of-a-kind floral arrangements made for special occasions. They are usually made of a single flower head, chenille stems, plastic eyes and other accessories. It is suitable for giving as gifts to children or expressing a theme or message. This pussy cat is made out of a single head of a standard mum and I used horse tail for its tail. The kids love it. It is really cute:)
Sunday, March 1, 2009
PAPER FLOWERS
I have seen this at craftstylish.com and really liked it. I hope I can find some time to make one for myself. Here is how to do it:
You need:
1- White translucent paper- Vellum paper
2- Floral wire- 14-16 gauge should be fine
3- Green floral tape
4- A 3" circle template- a juice glass would be good template
5- Scissors
6-Good quality paper glue
7- Needle nose pliers
Cut out 3" circles from your paper. You will need one disk per blossom. Fold each circle into eights and firmly press all creases. Trim the edges as shown in the illustration.
Unfold the disk and lay it flat. Trim again as shown on the second illustration.
Glue part A to part B and hold until dry. With your needle nose pliers form a small loop at one end of the floral wire and cover it with floral tape to form the pistil of the flower. Gently thread the wire through the center of the flower and tape the wire to make the stem of the flower. Attach two or more stems together by taping with the floral tape. Bend the stems to create the look you want and arrange in a vase.
You can find the complete instructions here.
Subscribe to:
Posts (Atom)
Tuesday, March 31, 2009
PUMPKIN DESIGN
Tuesday, March 10, 2009
RECTANGULAR VASES
Rectangular vases are very popular these days and they are perfect for these kinds of simple designs. Any flower that is cut short and placed in a rectangular vase looks beautiful.
Labels:
Arrangement Ideas,
Love and Romance,
Valentine's Day
Wednesday, March 4, 2009
WATERFALL DESIGN
Waterfall or cascading designs representing waterfall were initially created for bridal bouquets in Europe at the beginning of 1900s. They are usually heavy on foliage with even non botanical materials flowing downwards. They have an untidy, undisciplined appearance, representative of splashing, glistening water. White, blue and gray colored materials complement the overall theme. Dyed blue roses are especially interesting in this design.
Labels:
Arrangement Ideas,
Cascading,
Waterfall Design
Tuesday, March 3, 2009
Monday, March 2, 2009
PUSSY CAT
Novelty designs are different, one-of-a-kind floral arrangements made for special occasions. They are usually made of a single flower head, chenille stems, plastic eyes and other accessories. It is suitable for giving as gifts to children or expressing a theme or message. This pussy cat is made out of a single head of a standard mum and I used horse tail for its tail. The kids love it. It is really cute:)
Sunday, March 1, 2009
PAPER FLOWERS
I have seen this at craftstylish.com and really liked it. I hope I can find some time to make one for myself. Here is how to do it:
You need:
1- White translucent paper- Vellum paper
2- Floral wire- 14-16 gauge should be fine
3- Green floral tape
4- A 3" circle template- a juice glass would be good template
5- Scissors
6-Good quality paper glue
7- Needle nose pliers
Cut out 3" circles from your paper. You will need one disk per blossom. Fold each circle into eights and firmly press all creases. Trim the edges as shown in the illustration.
Unfold the disk and lay it flat. Trim again as shown on the second illustration.
Glue part A to part B and hold until dry. With your needle nose pliers form a small loop at one end of the floral wire and cover it with floral tape to form the pistil of the flower. Gently thread the wire through the center of the flower and tape the wire to make the stem of the flower. Attach two or more stems together by taping with the floral tape. Bend the stems to create the look you want and arrange in a vase.
You can find the complete instructions here.
Subscribe to:
Posts (Atom)